Radiography, time domain reflectometry (TDR) and magnetic methods are in principle suitable for detecting corrosion of steel tendons. In practice, radiography is normally too expensive and requires access to both sides of the prestressed member. The TDR method also fails to detect some tendons because their proximity means they are connected electrically with one another,84 but it works very well with electrically isolated tendons.
Amongst magnetic techniques, only the magnetic flux leakage measurement method (MFL) is appropriate for detecting ruptures in steel tendons in typical prestressed concrete members. The MFL method was first used to investigate prestressed concrete members by Kusenberger.86 Later, the MFL method was enhanced to allow its use in field conditions.87±93 Steel ropes have also been evaluated using this method for some time.94 The MFL method is based on magnetostatics. In contrast to radar and ultrasonic methods, the concrete has no influence on the measurements.
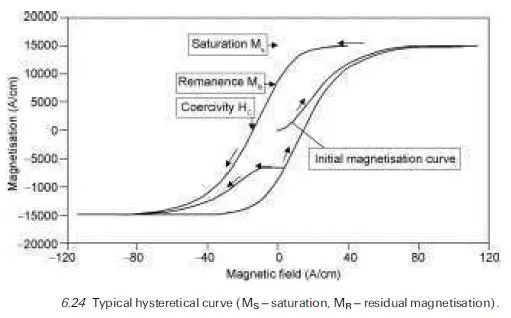
The MFL method works as follows. The tendon under consideration is magnetised by an exciting magnetic field H0…p; x ÿ x0†, which is generally generated by a moveable yoke-magnet. x0…t† denotes the actual position of the yoke-magnet, p describes the amount of the exciting field. The exciting field generates a magnetisation M…x; x0† in the tendon. The magnetic leakage field HS is caused by the magnetisation M of the tendon:

ˆ 0:06 cm/A; ˆ 1. Local disturbances of the magnetisation due to ruptures or reduction of the cross-section cause typical magnetic leakage signals. The magnetic flux leakage measurements can be performed during magnetisation (active field measurement) or as a residual field measurement after defined sequences of magnetisations.
To conduct the magnetic measurements, a probe containing the magnetisation device (electrically controlled yoke-magnet) and the magnet sensors (Fig. 6.25), is moved along the path of the prestressed tendons. Figure 6.26 shows signals typical of a rupture or crack in a tendon for measurements in the active field (AF) and the residual field (RFM) after magnetisation. In Fig. 6.26 the probe was moved from 0 to 300 cm. At this position, the exciting field was switched off. It can be seen that the length of the yoke-magnet affects the shape of the magnetic signals.
The MFL signals are affected not only by possible cracks in the tendons but also by the ducts and especially the stirrups, which have a smaller distance to the probe than the tendons. To suppress these unwanted signals, several techniques for measurement and analysis have been developed.90 After a suitable sequence of magnetisations, the relationship between signals caused by cracks or corro- sion in tendons and the signals caused by ducts and stirrups can be improved.
The signals caused by stirrups can be filtered out more easily in the case of residual field measurements than in the case of measurements in the active field.91 Measurements in the active field show more details than the residual field measurements, but the signal analysis is more difficult. In Fig. 6.27 the signals from the ducts or tendons under investigation show a typical saw-tooth shape (residual field signal) caused by the stirrups. The sum of both signals after filtering (removing of the signal portion of the stirrups) is shown at the top of Fig. 6.27. This remaining signal is evaluated by means of a correlation with a typical signal caused by a crack as shown in the lower part of Fig. 6.27. At the positions x ˆ 200 and x ˆ 250 cm, a good agreement with typical signals caused by cracking can be seen. By comparison with laboratory tests, it can be concluded that the tendon (concrete cover about 10 cm) has about 2±3 broken wires out of a total of 16 wires.
Investigating a prestressed member using MFL may be conducted as follows:
1. Location of the tendon, attaching the probe as near as possible to the tendon.
2. Application of a useful schedule of magnetisations to the member, i.e. a sequence of several passes for magnetisation and measuring.
3. Signal analysis (filtering signals caused by stirrups, correlation of remaining signals with signals typical for cracks, evaluation of the signals).

In Fig. 6.28, measuring equipment is shown at the site of a bridge investi- gation. Because of the magnetisation necessary, the probe is rather heavy, weighing approximately 50 kg. For this reason, using this method on site has to be carefully planned with regard to the necessary support constructions.
Experience in the field has shown that in post-tensioned members areas with heavy damage (i.e. considerable loss of the cross-section as a result of ruptures in several wires), as well as ruptures of single tendons in a duct, can be clearly recognised. However, ruptures of single wires or incipient cracks in a post- tensioned tendon cannot be detected, especially in cases where there are magnetic signals originating from any other embedded mild steel reinforcement elements such as anchorage points. The MFL method permits a relatively quick non-destructive scan of prestressed members. Visual inspection after uncovering the steel should, however, be performed to confirm these findings.